Building your own PC can be one of the most satisfying experiences for a tech enthusiast. Not only does it save you money, but it also gives you the flexibility to customize your computer based on your needs. However, for beginners, the process might seem overwhelming, with so many components and options available. In this article, we’ll guide you through the essential steps and share key tips to avoid common mistakes when building your own PC.
Why Build Your Own PC?
Building a PC offers several advantages. It’s cost-effective, as you can hand-pick each component, ensuring you only pay for what you need. Additionally, building a custom PC allows you to tailor your system to specific tasks, such as gaming, video editing, or productivity.
But for beginners, there are many things to keep in mind to ensure that the build goes smoothly. Let’s dive into some essential tips that will help you avoid common mistakes and build your PC with confidence.
1. Do Your Research Before You Buy
One of the biggest mistakes beginners make is buying components without fully understanding their compatibility. Each component needs to work together harmoniously, so before purchasing any parts, take time to research and ensure they are compatible with each other.
How to Research:
- Check Compatibility: Use tools like PCPartPicker, which helps you match compatible parts, such as motherboard, CPU, RAM, and GPU. It also provides price comparisons and compatibility warnings.
- Understand Your Needs: Decide on the primary use of your PC. Are you building a gaming PC, a workstation, or a general-use computer? This will guide your choices of components, such as CPU power, GPU performance, and memory.
- Check Reviews: Always check user reviews and expert opinions on the components you’re interested in. This helps avoid buying poorly rated or unreliable parts.
2. Choose the Right Case and Cooling System
Choosing the right case and ensuring adequate cooling is critical to the longevity and performance of your PC. A good case not only protects your components but also helps maintain airflow, which is essential for cooling.
What to Look For:
- Case Size: Ensure the case is big enough to accommodate all your components, especially your graphics card and motherboard. You’ll need a case with enough space to support the components you choose.
- Cooling Options: Good airflow is crucial. Look for cases with multiple fan mounting locations. Invest in high-quality fans or even liquid cooling systems if you plan to overclock your components.
- Cable Management: A case with cable management options will help keep your build neat and organized. This isn’t just for aesthetics—it also helps airflow, which can lower temperatures and improve performance.
3. Understand Your Motherboard and CPU Compatibility
The motherboard is the heart of your PC, connecting all the components together. It’s essential to choose the right motherboard that’s compatible with your processor (CPU) and other parts.
What to Keep in Mind:
- Socket Compatibility: The CPU socket on the motherboard must match the socket type of your CPU. For example, Intel and AMD use different sockets, so check the specifications carefully before purchasing.
- Chipset Features: Different chipsets offer different features, such as overclocking support, additional PCIe slots, and more. Research what features you need for your use case.
- Expansion Slots and Ports: Ensure that the motherboard has enough slots for your GPU, sound card, and any other expansion cards you plan to install. It should also offer the right types of USB ports, Ethernet ports, and audio outputs you require.
4. Don’t Overlook the Power Supply (PSU)
A common mistake beginners make is undervaluing the importance of a good power supply unit (PSU). The PSU provides the necessary power to run all your components, so choosing one that isn’t powerful enough or of poor quality can lead to system instability or even damage.
What to Look For:
- Wattage: Calculate the total wattage needed by your components using an online PSU calculator. This will help ensure that the PSU provides enough power for your entire build.
- Efficiency Rating: Look for PSUs with a high efficiency rating, such as 80+ Bronze, Silver, Gold, or Platinum. A more efficient PSU consumes less power and generates less heat.
- Brand and Quality: Don’t compromise on quality for a cheaper price. Choose a reputable brand with positive reviews to ensure you’re getting a reliable PSU.
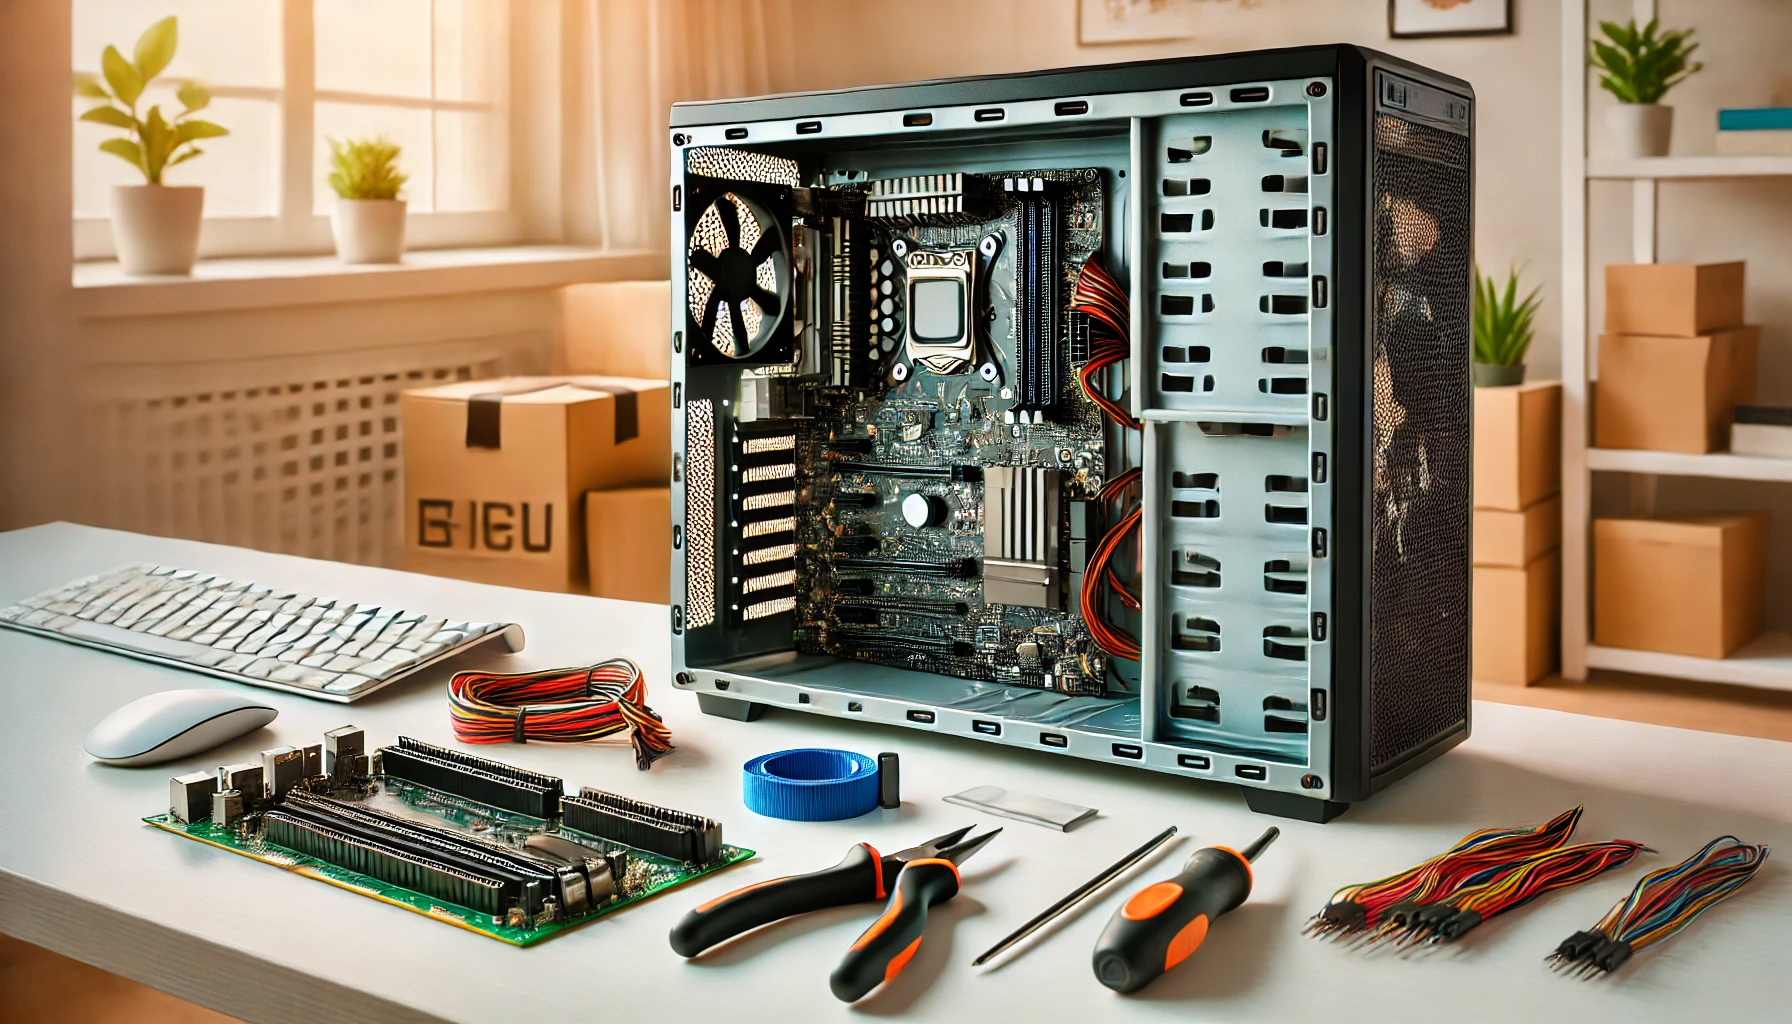
5. Install Components Carefully and in the Right Order
Installing components in the correct order is key to a successful build. Rushing or installing parts haphazardly can lead to mistakes or damage to delicate components.
Recommended Installation Order:
- Prepare Your Workspace: Make sure you have a clean, static-free workspace. Use an anti-static wristband to avoid damaging sensitive components.
- Install the CPU: Start by installing the CPU onto the motherboard. Make sure it’s correctly aligned with the socket, and handle it carefully to avoid bending the pins (if it’s an older CPU).
- Install the RAM: Place the RAM sticks into the appropriate DIMM slots, ensuring they click into place securely.
- Install the Motherboard: Mount the motherboard into the case, securing it with screws. Ensure that the motherboard’s I/O shield is properly positioned.
- Install the PSU: Install the PSU into the case and connect it to the motherboard and other components.
- Install the GPU and Storage Drives: Finally, install the GPU into the PCIe slot and connect your storage drives (SSD or HDD) to the motherboard.
6. Cable Management and Final Checks
Once all the components are installed, take the time to manage your cables neatly. Good cable management doesn’t just look better—it helps airflow, reduces clutter, and can even improve cooling performance.
Tips for Cable Management:
- Route Cables Behind the Motherboard Tray: Most modern cases have cable management channels where you can route cables behind the motherboard tray for a clean setup.
- Use Cable Ties: Use cable ties or Velcro straps to bundle cables together and keep them out of airflow paths.
- Make Sure All Connections Are Secure: Double-check all connections, ensuring that cables are plugged into the correct ports (e.g., GPU, PSU, storage).
7. Testing and Troubleshooting
Before you close up your case, it’s time to test your build. Power on the system and check if all components are functioning correctly. If the system doesn’t boot or you encounter errors, don’t panic.
What to Do:
- Check for Error Beeps: If the PC doesn’t boot, listen for any error beeps. These beeps indicate hardware issues and can guide you toward the problem.
- Monitor Temperatures: Use software like HWMonitor or Core Temp to check the temperatures of your CPU, GPU, and other components to ensure they are not overheating.
- Check BIOS/UEFI Settings: Sometimes, the motherboard may require you to manually configure settings such as RAM speeds or boot order. Access the BIOS/UEFI to make these adjustments.
Conclusion: Building Your First PC Doesn’t Have to Be Hard
Building your first PC can be a challenging but rewarding experience. By doing your research, choosing the right components, and following the right installation steps, you’ll be able to avoid common mistakes and create a high-performing system that suits your needs.
Remember, patience and attention to detail are key. Take your time, stay organized, and enjoy the process of bringing your dream PC to life!